Are Bamboo Hair Brushes Good for Your Hair?

Are Bamboo Hair Brushes Good for Your Hair?

Are Bamboo Hair Brushes Good for Your Hair?

Bamboo hair brushes have gained popularity in recent years as a natural and eco-friendly alternative to traditional hair brushes. But are they really good for your hair? In this article, we will explore the benefits of bamboo brushes and discuss why they are a great choice for maintaining healthy and beautiful hair.

Introduction

Your question might be: does a bamboo brush help hair growth? When it comes to hair care, using the right tools is essential. Traditional hairbrushes are often made of plastic or synthetic materials, which can cause friction and damage to the hair. Bamboo hair brushes, on the other hand, offer a natural and sustainable alternative that is gentle on your locks.

Understanding Bamboo Hair Brushes

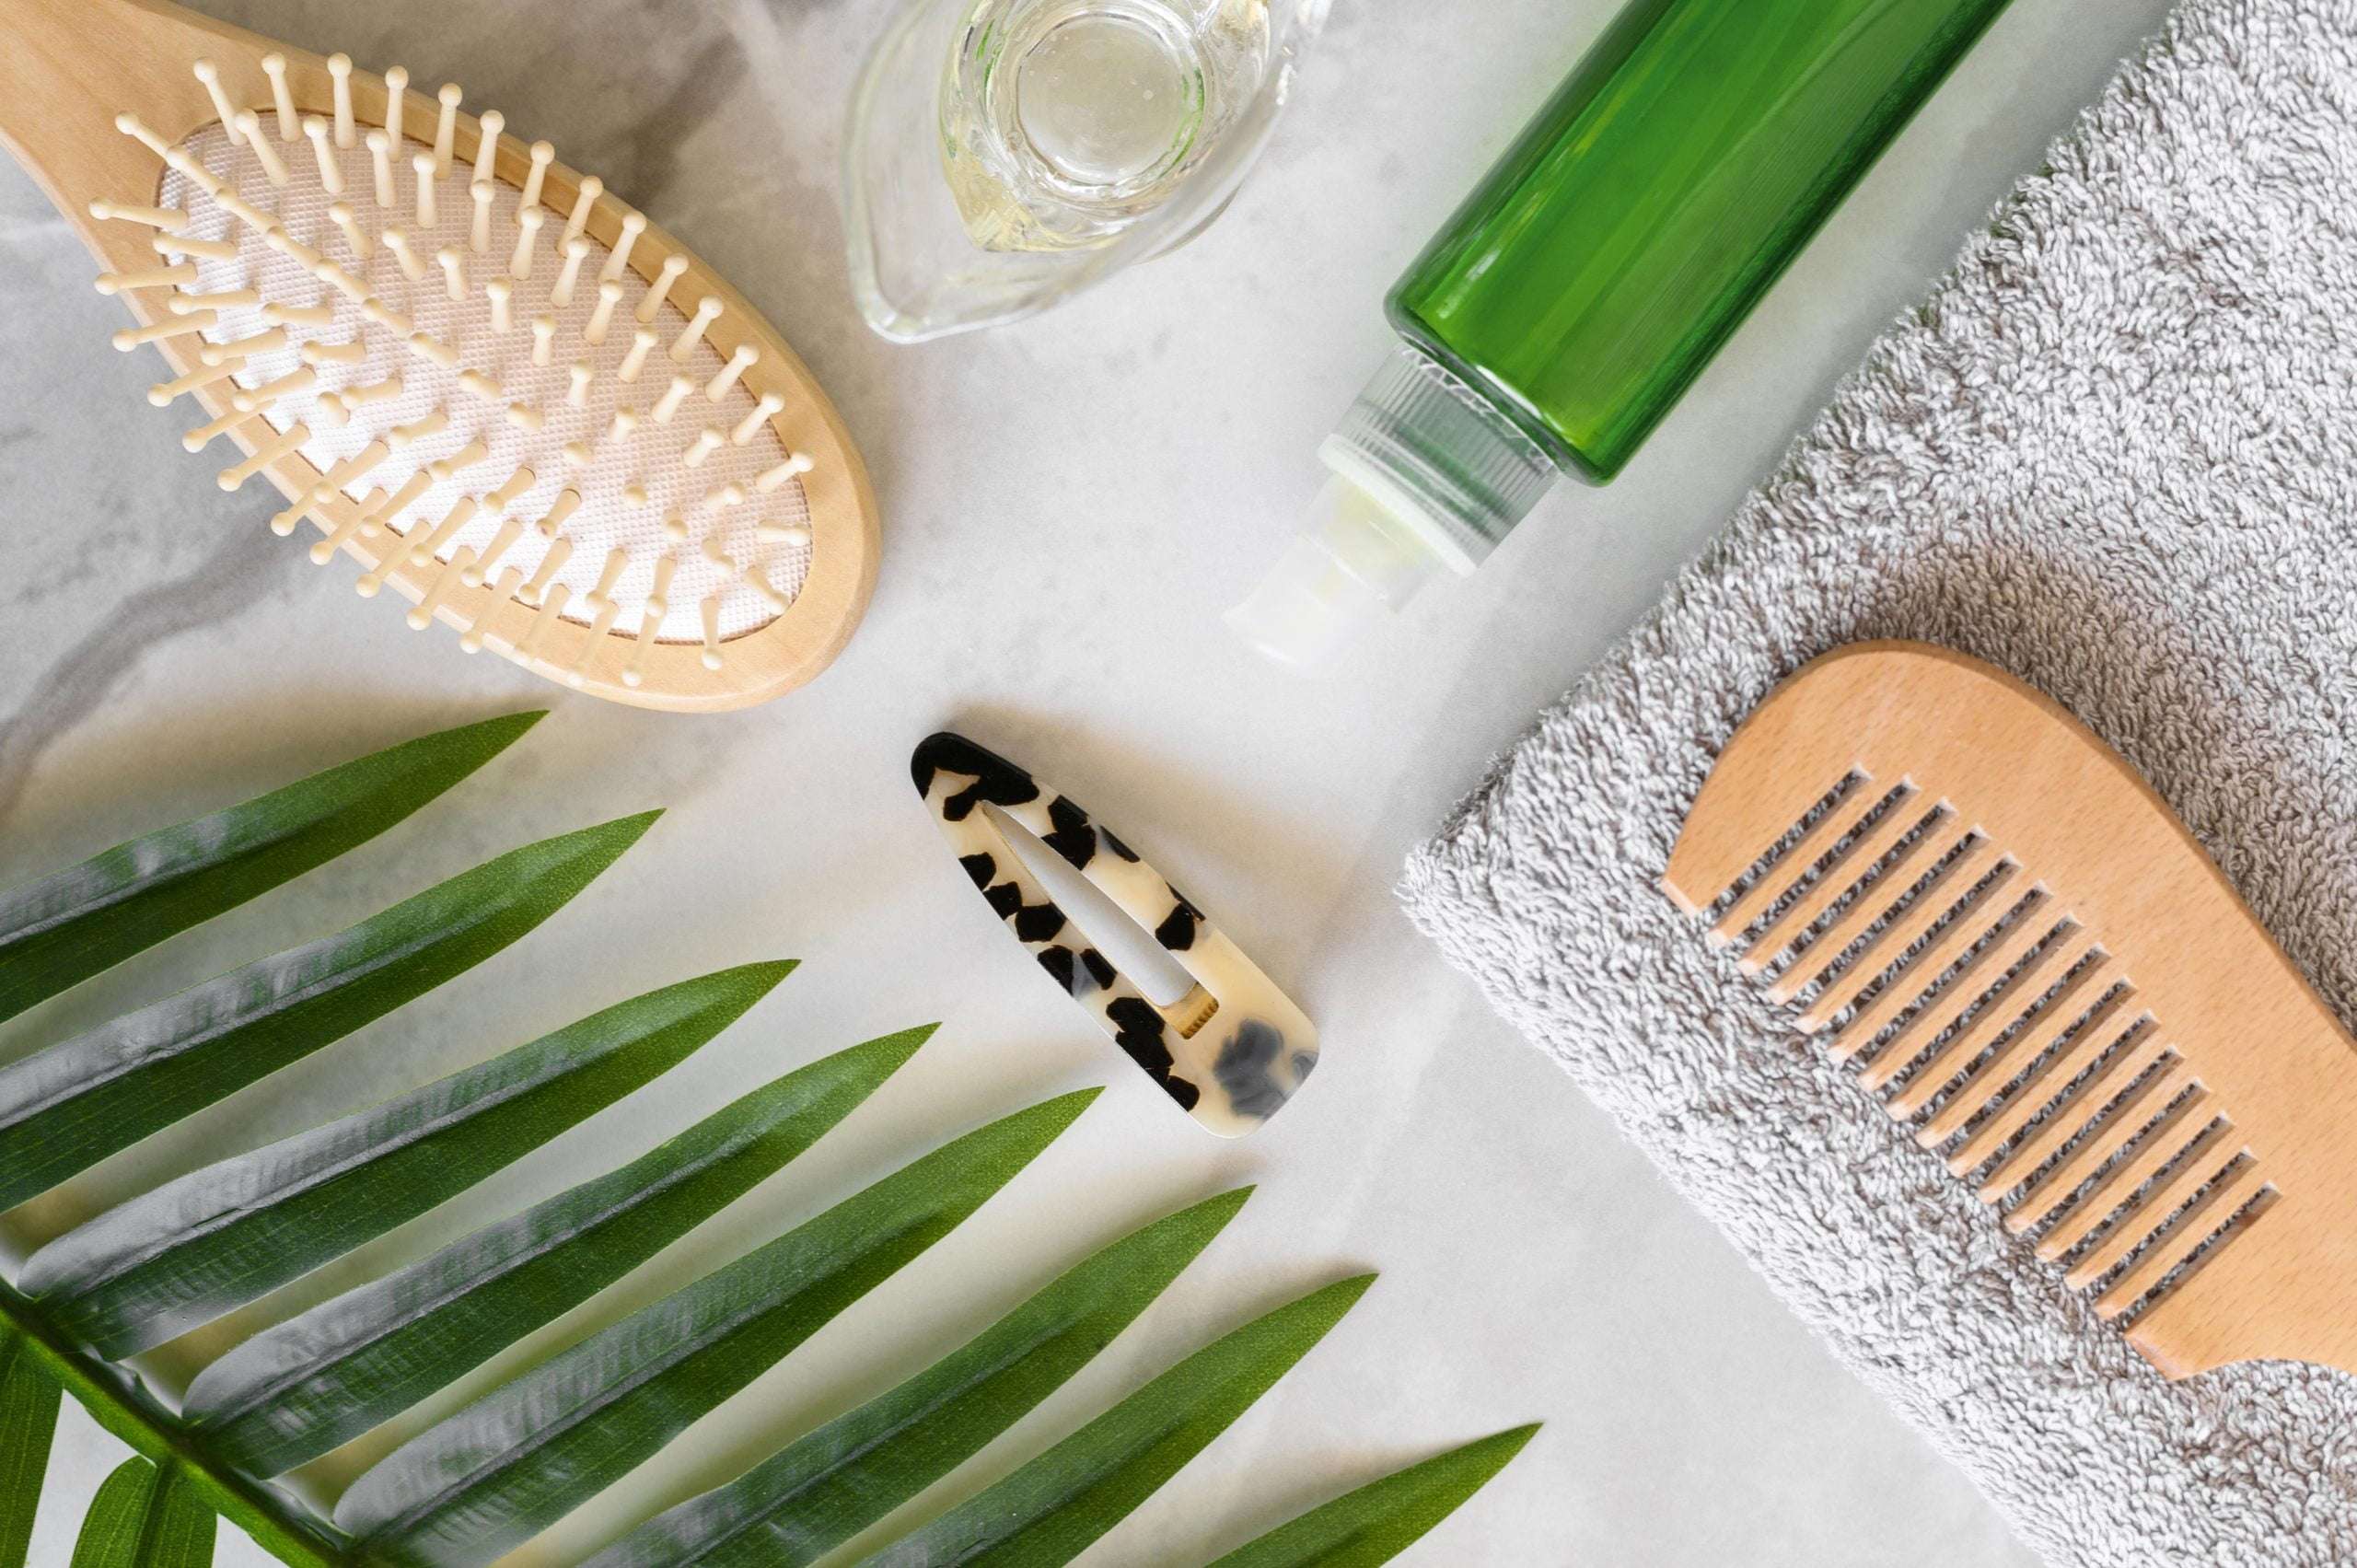
Bamboo brushes are crafted from bamboo, a fast-growing and renewable resource. A number of materials, including bamboo fibers, boar bristles, or a combination of both, can be used to create the bristles. These brushes are designed to detangle hair, stimulate the scalp, and distribute natural oils for healthier and shinier locks.

Benefits of Bamboo Hair Brushes

Benefits of Bamboo Hair Brushes

1. Environmentally Friendly:

One of the key advantages of bamboo brushes is their eco-friendly nature. Bamboo is a sustainable material that grows rapidly and requires minimal resources for cultivation. Unlike plastic brushes that contribute to pollution and waste, bamboo brushes are biodegradable and have a smaller carbon footprint.

2. Gentle and Anti-Static:

Bamboo hair brushes are known for their gentle bristles that glide smoothly through the hair without causing static or breakage. The natural properties of bamboo fibers help to reduce frizz and flyaways, leaving your hair looking sleek and well-managed. Additionally, the soft bristles are suitable for all hair types, including sensitive scalps.

3. Scalp Stimulation:

Regular brushing with a bamboo hair brush can provide a soothing massage to your scalp. The bristles gently stimulate the hair follicles, promoting blood circulation and encouraging healthy hair growth. This scalp massage also helps to relax and relieve tension, making it a relaxing self-care ritual.

4. Distribution of Natural Oils:

One of the unique features of bamboo hair brushes is their ability to distribute natural oils from the scalp to the ends of the hair. As you brush, the bristles collect the oils and evenly distribute them, preventing the hair from becoming dry or brittle. This natural conditioning effect enhances the shine and luster of your hair.

5. Durable and Long-Lasting:

Bamboo brushes are known for their durability and longevity. Bamboo is a strong and resilient material that can withstand daily use without losing its shape or effectiveness. By investing in a high-quality bamboo brush, you can enjoy its benefits for an extended period, reducing the need for frequent replacements.

6. Suitable for All Hair Types:

Whether you have straight, curly, thick, or fine hair, bamboo hair brushes can cater to all hair types. The flexibility of the bamboo bristles allows them to gently glide through different hair textures without causing damage or discomfort. It’s also worth noting that people with very thick or curly hair may choose to invest in a brush made for their needs, such as one with wider-spaced bristles.

Related: Are Wooden Brushes Good for Curly Hair?

Choosing the Right Bamboo Hair Brush

Choosing the Right Bamboo Hair Brush

When selecting the best bamboo hair brush, there are a few factors to consider to ensure it meets your specific needs.

Bristle Types:

Different bristle types offer varying benefits. For gentle detangling and scalp stimulation, opt for brushes with bamboo fiber bristles. If you desire additional shine and hair-smoothing effects, consider brushes with a combination of bamboo fiber and boar bristles.

Size and Shape:

You should choose the size and shape of the brush based on your hair length and desired styling. Larger brushes with wider bristle spacing are suitable for long and thick hair, while smaller brushes work well for shorter or finer hair.

Handle Design:

Consider the handle design for comfortable grip and control. Look for brushes with ergonomic handles that fit well in your hand and allow for easy maneuvering during styling.

Maintenance:

Ensure that the brush is easy to clean and maintain. Opt for brushes with removable bristle pads or cushioning, as they allow for easy cleaning and drying to maintain hygiene.

How to Use a Bamboo Hair Brush

How to Use a Bamboo Hair Brush

To make the most of your bamboo hair brush, follow these tips for proper usage:

Brushing Techniques:

Start brushing from the ends of your hair and gradually work your way up to the roots. This helps to prevent tugging and breakage. Use gentle, sweeping motions, and avoid aggressive brushing. Remember to be patient and take your time to detangle knots and distribute natural oils evenly.

Cleaning and Care:

Clean your bamboo hair brush regularly to remove hair, dust, and product buildup. Use a comb or your fingers to remove loose hair from the bristles. For a deeper clean, wash the brush with mild shampoo and warm water. Allow it to air dry completely before using it again. Learn more

Common Misconceptions About Bamboo Hair Brushes

While bamboo brushes offer numerous benefits, there are a few misconceptions worth addressing:

1. Limited Styling Options:

Contrary to popular belief, bamboo brushes can be used for various hairstyles and textures. They can be used for detangling, smoothing, and even creating volume. Experiment with different techniques and products to achieve your desired style.

2. Unsuitable for All Hair Types:

Bamboo hair brushes are suitable for most hair types, including curly, straight, thick, and fine hair. However, individuals with extremely thick or curly hair may find brushes with a combination of bamboo fiber and boar bristles more effective for detangling and managing their hair.

Tips for Maintaining a Bamboo Brush

Proper care and maintenance are vital for extending the lifespan of your bamboo brush. Follow these tips to ensure its longevity:

  • Remove any hair strands or debris from the bristles regularly. You can use a comb or your fingers to gently remove any trapped particles.
  • Clean your bamboo brush periodically by rinsing the bristles with warm water and a mild shampoo or gentle soap. Avoid soaking the bamboo handle, as excessive moisture can cause damage.
  • After cleaning, rinse the brush thoroughly and allow it to air dry completely before using it again.
  • Store your bamboo brush in a dry place away from direct sunlight to prevent any potential warping or damage.

Conclusion

In conclusion, bamboo hair brushes are an excellent choice for promoting healthy hair. They offer numerous benefits such as being environmentally friendly, gentle on the hair and scalp, and distributing natural oils. By selecting the right bamboo hair brush and following proper brushing techniques, you can enjoy the advantages of this natural and sustainable hair care tool.

FAQs

Are bamboo hair brushes suitable for sensitive scalps?

Yes, these brushes with soft bristles are gentle on sensitive scalps and can provide a soothing massage.

Do bamboo brushes cause static in the hair?

No, these brushes help reduce static and frizz, leaving your hair smooth and manageable.

can you use a bamboo brush on wet hair?

Experts recommend using bamboo brushes on dry or slightly damp hair to prevent breakage.

Are bamboo hair brushes durable?

Yes, bamboo brushes have a reputation for their durability and can last for a long time with proper care.

Can bamboo brushes be used on all hair types?

These brushes are suitable for most hair types, including straight, wavy, curly, thick, and fine hair.

How to Make a Wooden Table

How to Make a Wooden Table (in 10 Easy Steps)

How to Make a Wooden Table

Introduction

Are you interested in crafting your own wooden table? We would say that making a table from scratch may be an enjoyable and fulfilling experience because it enables you to design a special piece of furniture that suits your preferences and personal style. These detailed instructions will enable you to develop your woodworking skills and produce a lovely wooden table whether you are a novice or an expert carpenter.

Choosing the Right Wood

The first step in building a wooden table is selecting the right type of wood. Different woods have varying characteristics, such as grain patterns, hardness, and durability. Softwoods like pine and cedar are more affordable and easier to work with but may require additional maintenance over time. Consider your budget, desired aesthetics, and the table’s intended use when choosing the wood for your project. Learn more

1. Gathering the Necessary Tools and Materials:

Before you start constructing your wooden table, ensure you have all the essential tools and materials at hand. Some of the commonly required items include:

  • Table saw
  • Miter saw
  • Chisels
  • Clamps
  • Drill
  • Screws and nails
  • Wood glue
  • Sandpaper
  • Finishing materials (varnish, paint, or stain)

Having these tools readily available will make the construction process smoother and more efficient.

2. Designing Your Table:

Next, it’s time to unleash your creativity and design your wooden table. Consider the table’s dimensions, shape, and style. Sketch out your ideas on paper or use design software to visualize the final product. Take into account the space where the table will be placed, as well as your personal preferences and existing interior decor. Remember to balance aesthetics with functionality to ensure your table meets your needs.

3. Measuring and Cutting the Wood:

Once you have a design in mind, it’s crucial to measure and cut the wood accurately. Use a tape measure and mark the dimensions on the chosen wood, taking into account the tabletop, legs, and any additional components. Double-check your measurements to avoid mistakes before proceeding with the cutting process. Employing a table saw or miter saw, cut the wood according to the marked measurements, ensuring precision and accuracy.

4. Assembling the Tabletop:

After cutting the wood, it’s time to assemble the tabletop. Lay out the individual pieces and arrange them in the desired pattern. Apply wood glue along the edges of each piece and join them together, exerting gentle pressure. For added stability, use clamps to hold the pieces in place while the glue dries. Ensure the tabletop is flat and even, making any necessary adjustments before moving on to the next step.

5. Building the Table Legs:

The legs of your wooden table play a vital role in its stability and overall design. Measure and cut the wood for the legs, considering the desired height and style. Common leg designs include straight, tapered, or turned legs. Follow your chosen design, carefully cutting and shaping the wood to achieve the desired appearance. Sand the legs to smooth out any rough edges or imperfections.

6. Attaching the Legs to the Tabletop:

With the tabletop and legs prepared, it’s time to attach them securely. Position the legs at the corners or desired locations on the underside of the tabletop. Mark the attachment points, ensuring they are symmetrical and aligned. Pre-drill holes to prevent the wood from splitting, and then use screws or dowels to connect the legs to the tabletop. Double-check the stability of the connections and make any necessary adjustments.

7. Adding Support and Stability:

To enhance the strength and stability of your wooden table, consider adding support braces or stretchers. These components help prevent the table from wobbling or sagging over time. Measure and cut the wood for the support pieces, ensuring they fit snugly between the legs. Attach them securely with screws or dowels, reinforcing the overall structure of the table.

8. Sanding and Smoothing the Surface:

Achieving a smooth and flawless surface is essential for a well-crafted wooden table. Use sandpaper of varying grits to sand the tabletop, legs, and other components. Start with a coarse grit to remove any rough spots or imperfections, and gradually move to finer grits for a polished finish. Sand in the direction of the wood grain to avoid scratches and achieve a professional look.

9. Applying a Finish:

Applying a finish to your wooden table not only protects the wood but also enhances its appearance. Choose a finish that suits your style and desired level of durability. Options include varnish, paint, or stain. Apply the finish following the manufacturer’s instructions, using a brush or cloth to ensure an even and consistent coating. Before moving toward the next step just let the finish dry properly. Learn more

10. Final Touches and Detailing:

Once the finish has dried, inspect your wooden table for any remaining imperfections or rough edges. Use sandpaper or other suitable tools to smoothen out any areas that need refinement. Consider adding additional detailing, such as beveled edges or decorative accents, to enhance the table’s aesthetics. Take your time during this step to ensure every aspect of your wooden table meets your expectations.

Related Article: How to Make a Wooden Chair

Maintaining Your Wooden Table

Maintaining Your Wooden Table

Congratulations! You have successfully built your wooden table. To ensure its longevity and beauty, it’s important to take proper care of it. Avoid exposing the table to excessive heat or moisture, as this can damage the wood. Regularly clean the surface with a soft cloth and avoid using harsh chemicals that may cause discoloration. Periodically apply a fresh coat of finish to protect the wood and maintain its luster.

Conclusion

So, there you have it, people. This was our take on How to Make a Wooden Table, building your own wooden table is an exciting and fulfilling project that allows you to showcase your creativity and craftsmanship. You can create a beautiful and functional table that adds charm to your living space by following the step-by-step instructions provided in this article. Remember to choose the right wood, plan your design, take accurate measurements, and employ proper joinery techniques for a sturdy and long-lasting table. So roll up your sleeves, unleash your inner carpenter, and enjoy the process of bringing your wooden table to life!

FAQs

What type of wood is best for a wooden table?

The best type of wood for a wooden table depends on your preferences and requirements. Hardwoods like oak, maple, and walnut are popular choices due to their durability and aesthetic appeal.

How much time is required for making a wooden table?

The construction time for a wooden table varies depending on factors such as complexity, skill level, and available time. A typical hardwood table can be finished in anywhere between a few days and a few weeks.

Can I customize the design of my wooden table?

Absolutely! Making a wooden table from zero gives you the opportunity to make it according to your choice and requirements, which is one of its benefits. Feel free to unleash your creativity and make the table truly unique.

What tools do I need to make a wooden table?

Some essential tools for making a wooden table include a table saw, miter saw, chisels, clamps, drill, sandpaper, and finishing materials. Having the right tools at hand will make the construction process smoother.

How do I prevent the table from warping over time?

To prevent your wooden table from warping, it’s important to choose dry and seasoned wood. Avoid exposing the table to extreme temperature or humidity changes, and apply a suitable finish to protect the wood from moisture.

How to Clean Your Wooden Kitchen Table Daily

How to Clean Your Wooden Kitchen Table Daily

How to Clean Your Wooden Kitchen Table Daily

Wooden kitchen tables are a beautiful and functional addition to any home. They provide a warm and inviting space for meals, gatherings, and daily activities. However, with regular use, these tables can accumulate dirt, stains, and grime, which can diminish their appearance and longevity. To ensure that your wooden kitchen table maintains its beauty and durability, it’s crucial to clean it regularly and properly. We’ll walk you through the steps in this article so you can effectively clean your wooden kitchen table daily.

Introduction

A wooden kitchen table adds warmth and beauty to any home. Keeping it clean and well-maintained is a must if you want to extend its useful life. Regular cleaning helps prevent dirt, stains, and damage, keeping your wooden table looking its best for years to come.

Why Daily Cleaning Is Important

Daily cleaning of your wooden kitchen table is crucial to preserving its appearance and maintaining its condition. Regular cleansing prevents an increase in dust, dirt, and grime, which over time can cause scratches and damage. Additionally, daily cleaning allows you to quickly address spills and stains, preventing them from becoming permanent and harder to remove.

1. Gather Your Cleaning Supplies:

Before you start cleaning your wooden kitchen table, gather the necessary supplies. Here’s a list of items you will need:

  • Soft microfiber cloth
  • Dusting brush or a soft-bristle brush
  • Mild dish soap
  • Warm water
  • Distilled white vinegar
  • Lemon juice
  • Olive oil or beeswax polish
  • Clean, lint-free cloth

Having these supplies readily available will make the cleaning process more efficient.

2. Dusting and Removing Loose Debris:

Begin by dusting off your wooden kitchen table to remove any loose debris. Use a cloth made of microfiber or a cleaning brush to remove dust, debris, and other particles with care. Pay attention to the corners and crevices where dirt tends to accumulate. Dusting regularly helps prevent scratches when you start cleaning the surface.

Related Article: How to Clean a Wooden Dining Table

3. Preparing a Gentle Cleaning Solution:

To create a gentle cleaning solution, mix a few drops of mild dish soap with warm water in a bucket or basin. Avoid using harsh chemicals or abrasive cleaners, as they can damage the wood’s finish. For an extra boost of cleaning power, you can add a tablespoon of distilled white vinegar or lemon juice to the solution. These natural ingredients help cut through grease and remove stains effectively.

4. Cleaning the Surface:

Dip a soft microfiber cloth or sponge into the cleaning solution and wring it out to remove excess liquid. Gently wipe the entire surface of your wooden kitchen table, working in the direction of the wood grain. Pay attention to any sticky or stained areas and give them a little extra scrubbing. Be cautious not to oversaturate the wood with water, as excessive moisture can cause warping or swelling.

5. Wiping Dry and Polishing:

After cleaning, use a clean, lint-free cloth to wipe the table dry. Make sure to remove any leftover moisture to prevent water spots or damage. Once the surface is dry, you can apply a thin layer of olive oil or beeswax polish to enhance the wood’s natural shine and protect it from daily wear and tear. Apply the polish in the direction of the grain and buff it gently with a clean cloth.

6. Dealing with Stains:

If you encounter stubborn stains on your wooden kitchen table, don’t panic. For light stains, you can create a paste by mixing baking soda and water. Apply the solution to the stain, allow it to settle for several minutes, and then rub it gingerly with a soft cloth. For darker stains, you can use a fine-grade steel wool pad or sandpaper to carefully buff the affected area. Always follow up with polishing to restore the wood’s luster.

7. Seasonal Deep Cleaning:

While daily cleaning is essential, periodic deep cleaning is also necessary to keep your wooden kitchen table in top condition. Schedule a deep cleaning session every few months to remove grime buildup and restore the table’s natural beauty. This involves using specialized wood cleaners, following manufacturer instructions, and paying extra attention to hard-to-reach areas and intricate details.

Tips for Maintaining a Clean Table

To maintain the cleanliness and longevity of your wooden kitchen table, consider the following tips:

  • Use coasters or placemats to protect the table from heat, moisture, and scratches caused by hot dishes, glasses, or utensils.
  • Clean up spills immediately to prevent staining or warping of the wood.
  • Avoid using abrasive cleaners or harsh chemicals that can damage the table’s finish.
  • Regularly dust the table to prevent the accumulation of dirt and debris.
  • Keep the table away from direct sunlight or extreme temperature and humidity fluctuations, as these can cause fading or warping of the wood.

Conclusion

So, there you have it, people. This was our take on How to Clean Your Wooden Kitchen Table Daily. Cleaning your wooden kitchen table on a daily basis is a simple yet effective way to maintain its beauty and longevity. By following the steps outlined in this article, you can keep your table looking pristine and protect it from damage. Remember to use gentle cleaning solutions, avoid harsh chemicals, and take proactive measures to prevent stains and scratches. With proper maintenance, your wooden kitchen table will remain a focal point of your home for many years.

FAQs

1. Can I use regular household cleaners to clean my wooden kitchen table?

It’s best to avoid using regular household cleaners to clean your wooden kitchen table, as they may contain harsh chemicals that can damage the wood’s finish. Stick to mild dish soap, warm water, and natural ingredients like vinegar or lemon juice for safe and effective cleaning.

2. How often should I polish my wooden kitchen table?

Polishing your wooden kitchen table every few months or as needed helps protect the wood and maintain its luster. However, be cautious not to over-polish, as excessive buildup of polish can create a sticky residue.

3. What should I do if my wooden kitchen table gets scratched?

For minor scratches, you can try using a wood touch-up pen or applying a small amount of furniture wax. Deeper scratches may require professional repair or refinishing, depending on the severity.

4. Can I use bleach to remove tough stains from my wooden table?

Bleach is not recommended for removing stains from wooden tables as it can bleach the wood and cause discoloration. Stick to milder stain-removing methods, such as baking soda paste or fine-grade steel wool.

5. Is it necessary to use coasters on a wooden kitchen table?

Using coasters or heat-resistant mats is highly recommended to protect the wood from heat damage caused by hot objects. It’s a good practice to use coasters for cups, glasses, and other items that can create condensation or leave marks.

How to Clean a Wooden Dining Table

How to Clean a Wooden Dining Table

How to Clean a Wooden Dining Table

Introduction

Wooden dining tables are not only functional pieces of furniture but also add elegance and warmth to any dining area. However, they require proper care and maintenance to ensure their longevity and beauty. It is necessary to regularly clean to remove dirt and stains that accumulate over time. We’ll give you a step-by-step guide in this post on how to thoroughly clean a wooden dining table so that it looks its best for years to come.

Understanding the Type of Wood

Different types of wood have unique characteristics and cleaning requirements. Before beginning the cleaning procedure, determine the type of wood your dining table is made of. Cherry, walnut, oak, and maple are among the most popular options.

Step-by-Step Guide to Cleaning a Wooden Dining Table

Step-by-Step Guide to Cleaning a Wooden Dining Table

1. Gathering the Necessary Supplies:

To clean your wooden dining table effectively, gather the following supplies:

  • Soft microfiber cloth
  • Mild dish soap or wood cleaner
  • Warm water
  • White vinegar
  • Baking soda
  • Lemon juice
  • Olive oil or wood polish
  • Soft-bristle brush
  • Non-abrasive sponge

Having these supplies readily available will make the cleaning process more convenient and efficient.

2. Preparing the Table for Cleaning:

Before you start cleaning, remove any items from the dining table, such as placemats, coasters, or decorations. This will allow you to access the entire surface without any obstructions. Place a protective covering on the floor beneath the table to catch any drips or spills during the cleaning process.

3. Dusting the Table Surface:

Begin by dusting the table surface with a soft microfiber cloth. Gently wipe the table in the direction of the wood grain to remove loose dust and dirt particles. Avoid using feather dusters or rough materials that may scratch the surface of the wood.

4. Removing Stubborn Stains:

For stubborn stains, prepare a mixture of mild dish soap or wood cleaner and warm water. Dip a soft-bristle brush or non-abrasive sponge into the solution and gently scrub the stained area. Be cautious not to scrub too vigorously, as it may damage the wood. Rinse the brush or sponge frequently to prevent spreading the stain.

5. Dealing with Water Spots:

Water spots can be unsightly on wooden surfaces. To remove them, create a paste by mixing equal parts baking soda and water. Use the mixture in the water areas and leave it to rest for several minutes. Then, rub the paste gently with a delicate cloth until the spots disappear. Immediately dry the area after wiping it down with a moist cloth.

6. Cleaning Table Legs and Base:

Don’t forget to clean the table legs and base. Use the same mild soap and water solution or wood cleaner to wipe down these areas. Pay attention to corners and crevices where dirt can accumulate. Dry the legs and base thoroughly to prevent moisture from seeping into the wood.

7. Polishing and Conditioning the Wood:

To enhance the natural beauty of your wooden dining table, polish and condition the wood regularly. Mix equal parts white vinegar and olive oil, or use a commercial wood polish. Apply a small amount to a soft cloth and gently rub it onto the surface, following the wood grain. This will restore the shine and protect the wood from drying out.

8. Protecting the Table from Damage:

Lastly, to prevent scratches and damage, always use coasters, placemats, and tablecloths when placing items on the dining table. Avoid placing hot objects directly on the wood surface, as it can cause heat marks or discoloration. Use felt pads or tablecloth protectors under objects that may scratch the wood, such as vases or decorative items.

Related Article: How to Clean a Wooden Chair

Maintaining a Clean Dining Table

Regular maintenance is key to keeping your wooden dining table clean and beautiful. Follow these tips to maintain its appearance:

  • Wipe spills immediately to prevent staining.
  • Use placemats and coasters to protect the surface from heat, spills, and scratches.
  • Avoid dragging heavy objects across the table.
  • Dust the table regularly to prevent the buildup of dirt and dust particles.
  • Reapply wood polish or conditioner as needed to maintain the luster of the wood.
here is the full tutorial on How to Clean Wooden Furniture

Conclusion

So, there you have it, people. This was our take on How to Clean a Wooden Dining Table. A wooden dining table is a valuable investment that requires proper care and cleaning. By following the steps outlined in this guide, you can maintain the beauty and durability of your table for years to come. Remember to choose the appropriate cleaning supplies, handle stains with care, and protect the wood from potential damage. With regular maintenance, your wooden dining table will continue to be a centerpiece in your home.

FAQs

Can I use furniture polish on my wooden dining table?

Yes, you can use furniture polish specifically designed for wood. Follow the instructions on the product label for the best results.

How often should I clean my wooden dining table?

It is recommended to clean your wooden dining table at least once a week and perform a deeper cleaning every few months.

What should I do if there are scratches on my dining table?

For minor scratches, you can use a wood touch-up pen or a wax stick in a matching color to fill in the scratch. For deeper scratches, consult a professional for repair options.

Can I use bleach to clean my wooden dining table?

No, bleach is too harsh for wood and can damage the finish. Stick to mild dish soap or wood cleaner mixed with warm water.

How can I prevent my wooden dining table from drying out?

Regularly apply a wood polish or conditioner to keep the wood moisturized and prevent it from drying out.

How to Paint a Wooden Chair

How to Paint a Wooden Chair: A Guide for Beginners

How to Paint a Wooden Chair

Have you ever considered giving a worn-out wooden chair a bright and cheery makeover? A rewarding and enjoyable do-it-yourself activity that gives your furniture new life is painting a wooden chair. In this article, we’ll provide you with some useful advice on how to make your wooden chair into a magnificent object and how to paint a wooden chair at home that embodies your sense of style. So grab your paintbrushes and let’s get started!

Introduction

Painting a wooden chair can be a rewarding DIY project that breathes new life into an old piece of furniture. Whether you want to update the chair’s appearance or protect it from wear and tear, painting is an excellent option. Here are some tips to achieve a professional-looking finish. So let’s grab our brushes and get started!

1. Materials and Tools:

Before you begin, gather the following materials and tools:

  • Wooden chair
  • Sandpaper (medium and fine grit)
  • Tack cloth or a clean cloth
  • Primer
  • Paintbrushes (bristle or foam)
  • Paint of your choice
  • Paint tray or container
  • Painter’s tape
  • Drop cloth or newspaper
  • Sealer (optional)
  • Screwdriver (if the chair needs disassembling)
  • Cleaning supplies (soap, water, sponge)

2. Preparing the Chair:

Start by preparing the chair for painting:

Preparing the Chair
  • Place the chair on a drop cloth or newspaper to protect the surrounding area.
  • If the chair has cushions or fabric elements, remove them.
  • Use a screwdriver if necessary to remove any part, such as the seat or backrest.

3. Sanding the Surface:

To ensure the paint adheres properly, sand the wooden chair:

  • Begin with medium-grit sandpaper to remove any existing finish, rough spots, or imperfections.
  • Sand in the direction of the wood grain to avoid creating scratches.
  • After sanding the entire surface, switch to fine-grit sandpaper to achieve a smooth finish.
  • Wipe away the dust with a tack cloth or a clean cloth.

4. Priming the Chair:

Applying primer is crucial for better paint adhesion and long-lasting results:

  • Choose a primer suitable for your chair’s material (wood, metal, etc.).
  • Apply an even coat of primer using a paintbrush or foam roller.
  • Follow the manufacturer’s instructions regarding drying time between coats.

5. Choosing the Right Paint:

Selecting the right paint is essential for a successful chair painting project:

  • Consider the chair’s location and purpose (indoor or outdoor use).
  • Water-based latex paints are a popular choice for their ease of use and quick drying time.
  • Oil-based paints provide a durable finish but require more ventilation and a longer drying time.
  • Opt for paint with a satin or semi-gloss finish for easier cleaning and maintenance.

6. Applying the Paint:

Now it’s time to apply the paint to your wooden chair:

Applying the Paint
  • Stir the paint thoroughly to ensure an even consistency.
  • Dip the brush into the paint and remove the excess by tapping it against the side of the container.
  • Start painting from the top and work your way down, using long, smooth strokes.
  • Paint the hard-to-reach areas first and then move to larger surfaces.

7. Applying Multiple Coats:

  • Apply several coats of paint to achieve a smooth surface. Once the first coat has dried, gently sand the surface with fine-grit sandpaper.
  • Wipe away the dust with a tack cloth or a clean cloth.
  • Apply subsequent coats of paint, following the same technique as before.
  • The number of coats required depends on the desired color intensity and coverage.

8. Adding Decorative Finishes:

If you want to add decorative touches to your wooden chair, consider these options:

  • Use painter’s tape to create stripes, patterns, or borders.
  • Experiment with stencils to add intricate designs.
  • Apply a second paint color for a contrasting or complementary effect.
  • Use a small brush for detailed work or a sponge for a textured finish.

9. Allowing Proper Drying Time:

Patience is key when it comes to drying the paint on your wooden chair:

  • Follow the paint manufacturer’s instructions for drying time between coats.
  • Let the final coat dry completely, and then move on to the next step.
  • Adequate drying time ensures a durable and long-lasting finish.

10. Sealing the Paint:

While optional, sealing the paint provides additional protection:

  • Choose a clear sealer suitable for your chair’s location (indoor or outdoor).
  • Apply the sealer if you think it is necessary.
  • Sealing the paint enhances its durability and makes it easier to clean.

11. Reassembling the Chair:

If you disassembled any parts, now it’s time to put them back together:

  • Ensure that the paint is fully dry before reassembling the chair.
  • Use a screwdriver to reattach any screws or bolts securely.
  • Place the cushions or fabric elements back onto the chair, if applicable.

12. Cleaning Up:

Properly clean up after completing your painting project:

  • Clean your brushes with soap and water or the appropriate solvent.
  • Dispose of any used paint containers or materials according to local regulations.
  • Remove the drop cloth or newspaper and clean the surrounding area if necessary.

Maintenance Tips

To keep your painted wooden chair looking its best, follow these maintenance tips:

  • Wipe spills or stains promptly with a damp cloth.
  • Avoid dragging or scratching the chair on hard surfaces.
  • Use furniture pads or coasters to protect the chair’s legs from damage.
  • Regularly dust the chair to prevent the accumulation of dirt and debris.

Common Mistakes to Avoid

Here are some common mistakes to avoid when painting a wooden chair:

  • Skipping the sanding process can result in poor paint adhesion.
  • Applying paint too thickly leads to drips and an uneven finish.
  • Neglecting to prime the chair, can cause the paint to peel or chip.
  • Rushing the drying process may result in smudges or damage.

You may also like

How to Repair Wooden Chair Joints

Conclusion

So, there you have it, people. This was our take on How to Paint a Wooden Chair. Painting a wooden chair can transform it into a beautiful and functional piece of furniture. By following the steps outlined in this article, you can achieve professional-looking results even if you’re a beginner. Remember to take your time, choose the right materials, and follow proper techniques. With a little patience and creativity, you’ll soon have a painted wooden chair that adds a touch of style to your space.

FAQs

Q1: Can I paint over a wooden chair with an existing paint finish?
A1: Yes, you can paint over an existing paint finish. However, make sure to clean and lightly sand the surface to ensure proper adhesion.

Q2: Should I use a brush or roller to apply paint to my wooden chair?
A2: Both brushes and rollers can be used for painting a wooden chair. Brushes are ideal for detailed areas, while rollers are suitable for larger surfaces.

Q3: How long should I wait between coats of paint on my wooden chair?
A3: Adhere to the drying time recommendations made by the paint manufacturer. Generally, it’s recommended to wait a few hours between coats.

Q4: Can I paint a chair without sanding it first?
A4: While sanding is not always mandatory, it helps create a smoother surface and better paint adhesion, resulting in a more professional finish.

Q5: How can I remove paint drips or mistakes?
A5: If you notice any paint drips or mistakes while painting, wait for the paint to dry and lightly sand the area. Then, touch up the spot with additional paint.

How to Clean a Wooden Chair

How to Clean a Wooden Chair: A Complete Guide

How to Clean a Wooden Chair

Introduction

Wooden chairs add a touch of elegance and warmth to any space, but they require regular cleaning to maintain their beauty and longevity. It does not matter if you have a vintage heirloom or a modern wooden chair; it’s important to know the proper cleaning methods to keep them looking good. Here are the steps on how to clean a wooden chair effectively.

1. Gathering Cleaning Supplies:

Before you begin cleaning your wooden chair, gather all the necessary cleaning supplies. This may include:

  • Mild wood cleaner or a mixture of vinegar and water
  • Soft microfiber cloths
  • Soft-bristled brush
  • Toothbrush
  • Furniture polish or beeswax
  • Protective gloves

Having these supplies ready will make the cleaning process more efficient.

2. Dusting the Wooden Chair:

Start by dusting the wooden chair thoroughly to remove loose dirt and debris. Clean the surface gently using a soft cloth or a brush with soft bristles, being sure to get into all of the crevices and sensitive details. Avoid using rough materials because they can scratch the wood.

3. Removing Stains and Spills:

If your wooden chair has stains or spills, it’s important to tackle them promptly. Prepare a mild wood cleaner or a mixture of equal parts vinegar and water. Dampen a clean cloth with the solution and gently blot the stained area. Avoid rubbing vigorously, as this may damage the wood. For stubborn stains, you can use a toothbrush to gently scrub the area in a circular motion. Right after all the stains are removed, clean that area with a damp cloth to remove any residue.

4. Treating Scratches and Scuffs:

Over time, wooden chairs may develop scratches and scuffs. To treat minor scratches, apply a small amount of furniture polish or beeswax to a soft cloth and gently rub it into the affected area. The polish will help fill in the scratches and restore the chair’s natural luster. For deeper scratches, you may need to use a wood touch-up marker or filler, following the manufacturer’s instructions.

5. Polishing and Protecting the Wood:

To maintain the beauty and protect the wood, it’s important to polish your wooden chair regularly. Choose a high-quality furniture polish suitable for the type of wood used in your chair. Apply a small amount of polish to a clean cloth and gently buff the surface in circular motions. This will enhance the chair’s shine and provide a protective layer against moisture and dust.

6. Cleaning Upholstered Wooden Chairs:

If your wooden chair has upholstered parts, such as a cushion or a seat cover, it’s crucial to clean them properly. Check the manufacturer’s instructions for specific cleaning recommendations. In general, you can spot clean fabric upholstery using a mild upholstery cleaner or a mixture of gentle soap and water. For leather upholstery, use a leather cleaner and conditioner to keep it soft and supple.

Maintaining the Cleanliness of Wooden Chairs

To keep your wooden chairs looking their best, establish a regular cleaning routine. Here are a few tips for maintaining their cleanliness:

  • Dust the chairs regularly to prevent the buildup of dirt and dust.
  • Wipe spills immediately to prevent stains from setting in.
  • Avoid placing wooden chairs in direct sunlight to prevent fading or warping.
  • Use coasters or placemats to protect the wood from heat and moisture.
  • Periodically inspect the chairs for any damage or signs of wear.
  • By following these simple maintenance practices, you can extend the lifespan of your wooden chairs and keep them in excellent condition for years to come.

Conclusion

So, there you have it, people. This was our take on How to Clean a Wooden Chair. Cleaning a wooden chair doesn’t have to be a daunting task. With the right cleaning supplies and techniques, you can easily restore its beauty and maintain its longevity. Regular dusting, stain removal, polishing, and proper maintenance are key to preserving the natural charm of wooden chairs. Remember to follow the manufacturer’s instructions and take extra care when dealing with delicate upholstery. By implementing these tips, you’ll enjoy your clean and well-maintained wooden chair for many years to come.

FAQs

1. Can I use regular household cleaners to clean my wooden chair?
It’s best to use mild wood cleaners or a mixture of vinegar and water to avoid damaging the wood’s finish.

2. How often should I clean my wooden chair?
It’s recommended to dust your wooden chair regularly and perform a thorough cleaning at least once every few months.

3. What should I do if my wooden chair has water rings?
Gently rubbing water rings with a mixture of equal parts vinegar and olive oil will remove them. Wipe away the mixture with a clean cloth afterward.

4. Can I use wax on my wooden chair?
Yes, using furniture wax or beeswax can help protect and restore the wood’s natural shine. Apply it sparingly and buff it with a clean cloth.

5. Is it necessary to polish my wooden chair?
Polishing your wooden chair helps maintain its luster and provides a protective layer. It’s recommended to polish the chair every few months or as needed.

Are Wooden Dining Chairs Comfortable?

Are Wooden Dining Chairs Comfortable?

Are Wooden Dining Chairs Comfortable?

When it comes to choosing dining chairs, comfort is a top priority. After all, the dining area is a place where we gather to enjoy meals, engage in conversations, and spend quality time with our loved ones. Wooden dining chairs have been a popular choice for many years due to their timeless appeal and durability. However, one question often arises: Are wooden dining chairs comfortable? In this article, we will explore the comfort factor of dining chairs and provide practical tips for maximizing comfort during your dining experiences.

Introduction

Dining chairs play a crucial role in creating a comfortable and inviting dining area. While there are various materials and designs available, wooden dining chairs have a special charm that many people appreciate. However, the comfort aspect is often a concern for those considering wooden chairs. Let’s delve deeper into this matter and discover how you can make wooden dining chairs a comfortable seating option for your dining space.

The Appeal of Wooden Dining Chairs

Wooden dining chairs have long been favored for their aesthetic appeal and versatility. They can effortlessly blend with different interior styles, ranging from traditional to modern. The natural warmth and elegance of wood create a welcoming ambiance, making wooden chairs an excellent choice for both formal and casual settings.

Factors Affecting Comfort

wooden dining chairs in restaurant
outdoor wooden dining chairs

To assess the comfort level of wooden dining chairs, it’s essential to consider various factors that contribute to overall comfort.

Ergonomics and Design:

The design of a dining chair significantly impacts its comfort. Ergonomically designed chairs ensure proper support for your body, allowing you to sit for extended periods without discomfort. Look for chairs with well-proportioned dimensions, including seat height, seat depth, and backrest inclination, to promote a comfortable and natural sitting posture.

Seat Cushions:

Adding seat cushions can greatly enhance the comfort of wooden dining chairs. Opt for cushions made from high-quality foam or padding materials that offer adequate support and softness. Customizable cushions with ties can be easily attached and removed as needed, allowing you to adapt the seating experience to your preferences.

Backrest Support:

A supportive backrest is crucial for maintaining good posture and reducing strain on your back. When selecting wooden dining chairs, consider those with ergonomically curved or contoured backrests. These provide excellent support for the natural curve of your spine, promoting comfort during meals and conversations.

Related: How to Make Wooden Chairs Comfortable for Working?

Tips for Maximizing Comfort

Now that we have explored the factors influencing the comfort of wooden chairs, let’s discuss some practical tips for maximizing your seating comfort.

1. Choosing the Right Chair Design:

Opt for wooden dining chairs with ergonomic designs and comfortable proportions. Look for chairs that have a slightly angled backrest, a gentle curve to support your lower back, and well-padded seats. Testing out different chairs in person before making a purchase can help you find the right fit for your comfort needs.

2. Adding Seat Cushions or Pads:

As mentioned earlier, seat cushions can significantly improve the comfort of wooden chairs. Choose cushions that offer adequate padding and support for your seating preferences. Consider materials that are easy to clean and maintain, as dining chairs are prone to spills and stains.

3. Utilizing Lumbar Pillows:

If your chairs lack sufficient lower back support, lumbar pillows can be a great addition. These small pillows provide extra cushioning and help maintain the natural curve of your spine. They are particularly useful for individuals who experience back discomfort during prolonged sitting.

4. Considering Armrests:

Some wooden dining chairs come with armrests, which can offer added support and comfort. Armrests provide a place to rest your arms, reducing strain on your shoulders and upper back. If you enjoy leisurely meals or engage in extended conversations at the dining table, chairs with armrests may be a desirable option.

5. Ensuring Proper Chair Height:

The height of your dining chairs should complement the height of your dining table. Chairs that are too low or too high can lead to discomfort and awkward posture. Ideally, your dining chairs should allow you to sit with your feet flat on the floor and your arms at a comfortable angle when resting on the table.

Real-Life Situations: Comfortable Dining Experiences

Let’s explore some real-life situations where wooden dining chairs can provide a comfortable seating experience:

Family Gatherings:

Family Gatherings

Wooden dining chairs create a warm and inviting atmosphere, making them perfect for family gatherings. Whether it’s a casual weekend brunch or a festive holiday dinner, the comfort of wooden chairs ensures that everyone can relax and enjoy their meals while engaging in lively conversations.

Dinner Parties:

Dinner Parties

Hosting a dinner party involves extended periods of sitting and socializing. Comfortable wooden chairs allow your guests to feel at ease, ensuring they can fully enjoy the culinary delights and delightful company without any discomfort.

Long Meals and Conversations:

Long Meals and Conversations

Wooden dining chairs with proper ergonomic support enable you and your loved ones to linger at the table for extended periods, engaging in meaningful conversations over delicious food. These chairs’ comfort helps to maintain the focus on the relationships formed and the memories made.

Maintenance and care for long-lasting comfort

To ensure the ongoing comfort of wooden chairs, proper maintenance and care are essential. Follow these guidelines:

1. Regular cleaning:

Regularly clean your chairs to remove dust, dirt, and stains. Use a soft cloth or brush to avoid scratching the surface. Additionally, be mindful of any cleaning products you use, as some may damage the wood or its finish.

2. Periodic polishing:

Polishing wooden dining chairs periodically can help maintain their shine and protect the wood. Choose a suitable wood polish and apply it according to the manufacturer’s instructions.

3. Checking for loose joints:

Inspect your chairs periodically for any loose joints. Tighten screws or bolts if necessary to prevent squeaks and ensure stability.

4. Replacing worn-out parts:

If any part of the chair, such as the seat or backrest, becomes worn out or damaged, consider replacing it. This will help maintain the comfort and structural integrity of the chairs.

Conclusion

So, there you have it, people. This was our take on Are Wooden Dining Chairs Comfortable? These chairs can indeed be comfortable seating options if you prioritize ergonomics, design, and additional comfort-enhancing measures. By selecting well-designed chairs, adding seat cushions or pads, utilizing lumbar pillows, considering armrests, and ensuring proper chair height, you can create a cozy and inviting dining space that encourages relaxation, conversation, and unforgettable dining experiences.

FAQs

Q1: Are wooden dining chairs durable?

Yes, wooden dining chairs are known for their durability, especially when properly maintained.

Q2: Can I customize the upholstery of wooden dining chairs?

In many cases, these chairs can be customized with different upholstery options, allowing you to personalize their appearance and comfort.

Q3: How do I clean stains from wooden dining chairs?

For stain removal, use a mild solution of soap and water or a recommended wood cleaner. Avoid using harsh chemicals that may damage the wood.

Q4: Can I paint or stain wooden chairs?

Yes, these chairs can be painted or stained to change their color or match your desired aesthetic. Follow appropriate painting or staining techniques for the best results.

Q5: What should I do if the wooden dining chairs become wobbly?

If your chairs become wobbly, check for loose joints or screws. Tighten them as needed to restore stability.

How to Repair Wooden Chair Joints: A Comprehensive Guide

How to Repair Wooden Chair Joints: A Comprehensive Guide

How to Repair Wooden Chair Joints: A Comprehensive Guide

Wooden chairs are timeless pieces of furniture that add warmth and elegance to any space. However, over time, the joints of a wooden chair can become loose or damaged, compromising its stability and functionality. If you’re facing this issue, don’t worry! We’ll provide you with a step-by-step guide in this post on how to repair wooden chair joints successfully. Whether you are a DIY enthusiast or a beginner, this guide will help you restore your chair’s strength and prolong its lifespan.

Introduction

Wooden chairs are timeless pieces of furniture that add warmth and charm to any home. However, over time, the joints of these chairs may become loose or weakened, causing wobbling and instability. Instead of discarding a beloved wooden chair with faulty joints, you can restore its stability and extend its lifespan through simple repair techniques. In this article, we will guide you step-by-step on how to repair wooden chair joints effectively.

Understanding Wooden Chair Joints

How to Repair Wooden Chair Joints

Before embarking on the repair process, it’s important to understand the different types of wooden chair joints commonly used. The most common joints found in wooden chairs include mortise and tenon joints, dowel joints, and corner block joints. Each joint type requires specific repair techniques to ensure a strong and durable result.

How to Repair Wooden Chair Joints in Steps

Now that you have everything you need, let’s get started on repairing your wooden chair joints. Here is a detailed instruction:

Step 1: Tools and Materials Needed:

To repair wooden chair joints, you’ll need a few essential tools and materials. These include:

  • Screwdriver or drill
  • Rubber mallet
  • Wood glue
  • Clamps
  • Dowels
  • Sandpaper
  • Wood filler
  • Paint or stain (optional)
  • Brushes

Gathering these tools and materials beforehand will ensure a smooth and efficient repair process.

Step 2: Assessing the Damage

Next, carefully examine the chair to identify the extent of the damage. Look for loose joints, cracks, or splits in the wood. Assessing the damage will help you determine the appropriate repair techniques needed for each joint.

Step 3: Disassembling the Chair

To repair wooden chair joints effectively, it’s often necessary to disassemble the chair. Carefully remove any screws or nails securing the joints. Use a rubber mallet to gently tap the joints apart if they are glued or wedged together. Take note of the disassembly process to aid in reassembling the chair later.

Step 4:Repairing Loose Joints

Loose joints are a common issue in wooden chairs. To repair them, apply wood glue to the joint surfaces, and then carefully reassemble the joint. Wipe off any excess glue and use clamps to hold the joint firmly in place while the glue dries. Allow sufficient drying time as per the glue manufacturer’s instructions.

Step 5: Regluing and Clamping the Joints

Once you’ve finished repairing loose joints, consider using dowels along with wood glue for stronger joint reinforcement. Drill holes into the joint surfaces, add glue, and insert dowels. Then, carefully reassemble the joint, ensuring the dowels fit snugly. Apply clamps to hold the joint together until the glue dries completely.

Related: How to Make Wooden Chairs Comfortable for Working?

Step 6: Reinforcing the Joints with Dowels

In cases where the joints are severely damaged, reinforcing them with dowels can provide additional strength. Remove any weakened wood around the joint and drill corresponding holes for the dowels. Apply wood glue to the dowels and insert them into the holes, aligning the joint parts properly. Clamp the joint and allow the glue to dry thoroughly.

Step 7: Filling and Sanding

After the joints have been repaired and the glue has dried, inspect the chair for any gaps or imperfections. Use wood filler to fill in these areas and let it dry. Once dry, sand the filled areas and the rest of the chair surface to achieve a smooth finish. Start with rough-grit sandpaper and gradually move to finer-grit sandpaper for a polished look.

Step 8: Reassembling the Chair

With the joints repaired and the chair sanded, it’s time to reassemble the chair. Follow the disassembly process in reverse, ensuring all joints fit securely. Tighten any screws or nails that were previously removed, and double-check the stability of the chair.

Step 9: Finishing Touches

Lastly, to enhance the appearance and protect the repaired chair, you can apply a coat of paint or stain. Choose a color that complements your decor and follow the manufacturer’s instructions for application. Apply multiple thin coats for an even and durable finish. Once the paint or stain is dry, consider adding a protective sealant for added longevity.

Maintaining the Repaired Chair

After repairing the wooden chair joints, it’s important to maintain the chair properly to prevent future damage. Avoid exposing the chair to excessive humidity or direct sunlight, as these conditions can weaken the wood and joints. Regularly inspect the chair for any signs of wear or loosening joints and address them promptly to ensure its continued stability.

Common Mistakes to Avoid

While repairing wooden chair joints, it’s essential to avoid common mistakes that can compromise the integrity of the repair. Some common mistakes to avoid include:

  • Rushing the repair process without allowing sufficient drying time for the glue.
  • Over-clamping can lead to excess glue squeeze-out and weak joints.
  • Neglecting to remove weakened wood before reinforcing with dowels.
  • Using the wrong type of glue for the chair’s wood type.
  • Skipping the sanding step results in an uneven or rough finish.
  • By being mindful of these mistakes, you can ensure a successful repair and restore the chair’s stability effectively.

Conclusion

Repairing wooden chair joints is a practical and cost-effective way to restore stability and prolong the life of your cherished chairs. By following the step-by-step guide outlined in this article, you can confidently repair loose or damaged joints, ensuring your wooden chairs remain sturdy and functional for years to come. Remember to take your time, use appropriate techniques and materials, and enjoy the satisfaction of breathing new life into your favorite wooden chairs.

FAQs

Q: Can I repair a wooden chair with damaged joints myself?

Yes, with the right tools and techniques, you can repair wooden chair joints yourself and restore the chair’s stability.

Q: How long does it take for wood glue to dry completely?

The drying time for wood glue varies depending on the type and brand. It is recommended to follow the manufacturer’s instructions for the specific glue used.

Q: What type of wood filler should I use for repairing wooden chair joints?

Choose a wood filler specifically designed for furniture repairs. Look for one that is easy to apply, sandable, and paintable.

Q: Can I paint or stain the chair after repairing the joints?

Yes, painting or staining the chair can enhance its appearance and protect the repaired joints. Follow the manufacturer’s instructions for the best results.

Q: How often should I inspect the chair after repairing the joints?

It’s advisable to regularly inspect the chair for any signs of wear or loosening joints. Check the chair every few months to ensure its stability and address any issues promptly.

How to Make a Wooden Chair: A Step-by-Step Guide

How to Make a Wooden Chair: A Step-by-Step Guide

How to Make a Wooden Chair: A Step-by-Step Guide

Introduction

Crafting your own wooden chair can be a rewarding and fulfilling experience. Whether you are a woodworking enthusiast or just a beginner, with the correct tools, and techniques, you can create a beautiful and functional wooden chair that will last for years to come. This article will walk you through the steps of making your own wooden chair while providing detailed steps, tips, and tricks along the way.

Also Read: Are Wooden Chairs Good For Your Back?

Steps For Creating a Wooden Chair

1. Gathering Materials and Tools:

Gathering Materials and Tools

To make a wooden chair, get all the materials and tools required. You will need:

  • Wood (such as oak, pine, or walnut)
  • Measuring tape
  • Pencil
  • Table saw or circular saw
  • Miter saw
  • Drill
  • Chisels
  • Hammer
  • Wood glue
  • Clamps
  • Sandpaper (various grits)
  • Finish (such as stain or varnish)
  • Upholstery materials (if desired)

2. Choosing the Right Wood:

Selecting the right type of wood is crucial for the durability and aesthetic appeal of your wooden chair. Hardwoods like oak and walnut are popular choices due to their strength and natural beauty. Softwoods like pine are more affordable and easier to work with, making them suitable for beginners. Consider factors such as grain pattern, color, and availability when making your decision.

3. Planning the Chair Design:

Planning the Chair Design

Start by planning the design of your wooden chair. Consider the style, dimensions, and ergonomics. Sketch out your ideas on paper or use design software to visualize the chair’s structure and aesthetics. Determine the chair’s overall height, seat height, width, and backrest angle.

4. Preparing the Wood:

Prepare the wood by measuring and marking the dimensions according to your design. Use a saw to cut the boards into the required pieces for the chair’s frame, seat, legs, and backrest. Ensure that the edges are straight and smooth.

5. Cutting and Shaping the Wood:

Cutting and Shaping the Wood

Next, cut and shape the wood pieces according to your design. Use a saw to make precise cuts for the chair’s joints and angles. Use chisels to remove excess wood and create intricate details or curves.

6. Assembling the Chair Parts:

Assembling the Chair Parts

Now it’s time to assemble the chair parts. Apply wood glue to the joints and use clamps to hold the pieces together securely. Follow your design plan carefully to ensure accurate alignment and stability. Let the glue dry.

7. Sanding and Smoothing the Chair:

Once the glue has dried, use sandpaper to smooth the surfaces of the chair. Start with a coarser grit and gradually move to finer grits for a polished finish. Sand along the wood grain to avoid scratches. Pay attention to the edges and corners to achieve a comfortable and visually appealing shape.

8. Applying Finish to the Chair:

Applying Finish to the Chair

To protect and enhance the natural beauty of the wood, apply a finish to the chair. Choose a finish that suits your preferences, such as varnish, oil, or paint. Apply the finish evenly using a brush or cloth. Follow the manufacturer’s instructions for drying and curing times.

9. Adding Upholstery (Optional):

If desired, you can add upholstery to your wooden chair for added comfort and style. Measure and cut foam padding and fabric to fit the seat and backrest. Attach the upholstery using a staple gun or adhesive. Ensure the upholstery is taut and free of wrinkles for a professional look.

Related: How to Make Wooden Chairs Comfortable for Working?

10. Final Touches and Quality Check:

Lastly, Give your chair a final inspection and make any necessary adjustments. Check for any loose joints or rough edges. Test the chair’s stability and comfort by sitting on it. Make sure all components are securely fastened. If needed, apply an additional finish or make minor refinements.

Conclusion

Congratulations! You have successfully learned how to make a wooden chair from start to finish. Crafting your own chair allows you to showcase your woodworking skills and create a personalized piece of furniture. By following the steps outlined in this guide and employing your creativity, you can craft a chair that adds charm and character to your space. Remember to prioritize safety throughout the process and enjoy the satisfaction of sitting on a chair that you made with your own hands.

FAQs

1. Is woodworking experience necessary to make a wooden chair?

While prior woodworking experience is helpful, beginners can also learn and make a wooden chair by following detailed instructions and practicing essential woodworking techniques.

2. Can I use softwood instead of hardwood for the chair?

Hardwood is generally recommended for its durability and strength. Softwood may be suitable for certain chair components, but it may require additional reinforcement and maintenance.

3. What tools are essential for making a wooden chair?

Key tools for making a wooden chair include a saw, chisels, clamps, sandpaper, and measuring tools. Additional tools such as drills and routers may be required for specific designs.

4. How long does it take to make a wooden chair?

The time required depends on the complexity of the design, your woodworking skills, and the availability of tools. It can range from several days to a few weeks.

5. Can I customize the design of my wooden chair?

Absolutely! Feel free to customize the design according to your preferences. Experiment with different shapes, finishes, and upholstery options to create a unique chair that reflects your style.

How to Make Wooden Chairs Comfortable for Working?

How to Make Wooden Chairs Comfortable for Working?

How to Make Wooden Chairs Comfortable for Working?

Due to their sturdiness, aesthetic appeal, and classic charm, wooden chairs have been a preferred choice for furniture. Even so, wooden chairs occasionally have a drawback: they can be unpleasant, especially when used for prolonged periods of time, like during work or study sessions. Sitting on a hard wooden chair for hours can lead to discomfort, body aches, and reduced productivity. In this blog post, we will examine the understanding of the discomfort of wooden chairs, and we’ll also provide you with tips on how to make wooden chairs comfortable for working.

Introduction

Wooden chairs are renowned for their classic beauty and durability, but when it comes to extended sitting sessions, they can cause discomfort and hinder productivity. There are different ways to get the best comfort from wooden chairs and make them more comfortable for long hours of work.

Understanding the Discomfort of Wooden Chairs

Which is the best chair for long hours, wooden ones or wired steel chairs?

1. The Firmness Factor:

One of the primary reasons wooden chairs can be uncomfortable is their inherent firmness. Unlike chairs with cushioned seats, wooden chairs offer little to no padding, resulting in a lack of shock absorption and pressure relief. Sitting on a hard surface for a very long time can cause numbness, discomfort, and even pain.

2. Lack of Ergonomic Design:

Another factor contributing to the discomfort of wooden chairs is their limited ergonomic design. Ergonomics’ main focus is on optimizing the interaction between individuals and their environment to give the best comfort, efficiency, and well-being. Wooden chairs often lack the ergonomic features necessary for proper spinal alignment, leading to backaches and strained muscles.

3. Insufficient Lumbar Support:

Wooden chairs rarely provide adequate lumbar support, which is crucial for maintaining a healthy posture. The absence of lumbar support can strain the lower back, resulting in discomfort and potential long-term issues.

4. Absence of Cushioning:

The absence of cushioning on wooden chairs means there is no padding to absorb pressure and provide a comfortable sitting experience. This can lead to discomfort and fatigue, especially during prolonged sitting sessions.

Advantages of Wooden Chairs

Wooden chairs offer several advantages that make them a popular choice, despite their potential comfort considerations.

Durability and Longevity:

Wooden chairs are known for their durability and longevity. When properly cared for, they can withstand daily use for many years. Unlike some other materials, wood does not easily deteriorate or lose its structural integrity over time.

Aesthetics and Versatility:

The natural beauty and warmth of wood make it a visually appealing choice for furniture. Wooden chairs come in various designs and finishes, allowing them to complement a wide range of interior styles. From rustic to contemporary, wooden chairs can seamlessly fit into different settings.

Environmental Considerations:

Sustainable sourcing and manufacturing processes make wooden chairs an eco-friendly choice. Wood is a renewable resource, and responsible forestry practices ensure its long-term availability. Choosing wooden furniture supports the use of natural materials and reduces reliance on non-renewable resources.

Tips to Make Wooden Chairs Comfortable for Working

1. Add Seat Cushions:

One of the simplest and most effective ways to make a wooden chair more comfortable is by adding a seat cushion. Cushions provide a layer of padding that enhances comfort and reduces the pressure exerted on the body. Choose cushions that are thick, supportive, and made of high-quality materials for optimal comfort.

2. Use Lumbar Pillows:

To address the lack of lumbar support in wooden chairs, consider using lumbar pillows. These pillows are designed to support the natural curve of your lower back, promoting better posture and reducing discomfort. Place the lumbar pillow at the curve of your lower back for maximum support and comfort.

3. Employ Chair Pads:

Chair pads are another excellent option for adding comfort to wooden chairs. These pads come in various shapes, sizes, and materials, allowing you to choose the one that best suits your needs. Chair pads offer both cushioning and insulation, making your wooden chair more comfortable and cozy.

4. Opt for Armrest Covers:

If your wooden chair has armrests, consider using armrest covers. These covers provide padding and softness to the armrests, reducing pressure and enhancing overall comfort. Look for covers that are easy to install and remove for convenient maintenance.

5. Consider a Chair Mat:

If your wooden chair is placed on a hard floor surface, such as tile or hardwood, consider using a chair mat. Chair mats offer a cushioned and smooth surface for the chair’s wheels or legs, easing body stress and preventing discomfort from the chair’s contact with the hard floor.

6. Utilize Backrest Support:

Another tip to enhance the support and comfort of your wooden chair is to attach a backrest support. Backrest supports are designed to improve posture and provide additional lumbar support. They are adjustable and can be easily attached to the backrest of your chair, promoting a more comfortable and ergonomic sitting position.

7. Adjust Chair Height and Position:

Proper chair height and position are essential for maintaining good posture and reducing discomfort. Make sure your wooden chair is adjusted to a height that allows your feet to rest flat on the ground and your knees to form a 90-degree angle. Additionally, position your chair and desk in a way that keeps your arms relaxed and your wrists in a neutral position while working.

8. Take Breaks and Stretch:

Regardless of how comfortable your wooden chair becomes, it is crucial to take regular breaks and engage in stretching exercises. Prolonged sitting can still lead to discomfort and health issues. Stand up, stretch your body, and walk around every 30 minutes to improve circulation and relieve muscle tension.

9. Maintain Proper Posture:

Maintaining proper posture is vital for reducing discomfort while sitting on a wooden chair. Sit upright with your back aligned against the backrest, keep your shoulders relaxed, and avoid slouching. Distribute your body weight evenly on both hips and if needed, use a footrest to support your feet.

10. Consider Alternatives to Wooden Chairs:

If you find it challenging to make your wooden chair comfortable despite the various adjustments and additions, it might be worth considering alternative seating options. Ergonomic office chairs or chairs with padded seats and backrests can provide superior comfort and support for long working hours.

Conclusion

So, there you have it, people. This was our take on How to Make Wooden Chairs Comfortable for Working. Wooden chairs are undeniably elegant and durable, but they can be uncomfortable for extended periods of sitting. By following the tips mentioned in this article, you can significantly improve the comfort of your wooden chair for working or studying. Adding cushions, using lumbar pillows, employing chair pads, and adjusting your chair’s position are just a few ways to enhance your sitting experience. Remember to prioritize proper posture, take breaks, and consider alternative seating options if needed. With these adjustments, you can transform your wooden chair into a comfortable and productive workspace.

You may also like

FAQs

1. Can I use any type of cushion for my wooden chair?

Yes, you can use various types of cushions for your wooden chair. Look for cushions that are thick, supportive, and made of high-quality materials for optimal comfort.

2. How can I choose the right lumbar pillow for my needs?

When choosing a lumbar pillow, consider its firmness, shape, and adjustability. Look for a pillow that provides adequate support for the natural curve of your lower back and can be adjusted to fit your chair and body.

3. Are chair pads easy to install?

Yes, most chair pads are designed to be easily installed and removed. They often come with straps or ties to secure them to the chair, ensuring they stay in place during use.

4. Will armrest covers fit all wooden chair designs?

Armrest covers come in various sizes and designs. While some covers may fit most standard wooden chairs, it is recommended to check the dimensions and specifications to ensure a proper fit.

5. Can a chair mat prevent discomfort caused by a wooden chair on hard flooring?

Yes, a chair mat can give your wooden chair cushioning and a smooth surface, reducing the strain on your body from the chair’s contact with a hard floor surface.