
Introduction
Crafting your own wooden chair can be a rewarding and fulfilling experience. Whether you are a woodworking enthusiast or just a beginner, with the correct tools, and techniques, you can create a beautiful and functional wooden chair that will last for years to come. This article will walk you through the steps of making your own wooden chair while providing detailed steps, tips, and tricks along the way.
Also Read: Are Wooden Chairs Good For Your Back?
Steps For Creating a Wooden Chair
1. Gathering Materials and Tools:

To make a wooden chair, get all the materials and tools required. You will need:
- Wood (such as oak, pine, or walnut)
- Measuring tape
- Pencil
- Table saw or circular saw
- Miter saw
- Drill
- Chisels
- Hammer
- Wood glue
- Clamps
- Sandpaper (various grits)
- Finish (such as stain or varnish)
- Upholstery materials (if desired)
2. Choosing the Right Wood:

Selecting the right type of wood is crucial for the durability and aesthetic appeal of your wooden chair. Hardwoods like oak and walnut are popular choices due to their strength and natural beauty. Softwoods like pine are more affordable and easier to work with, making them suitable for beginners. Consider factors such as grain pattern, color, and availability when making your decision.
3. Planning the Chair Design:
Start by planning the design of your wooden chair. Consider the style, dimensions, and ergonomics. Sketch out your ideas on paper or use design software to visualize the chair’s structure and aesthetics. Determine the chair’s overall height, seat height, width, and backrest angle.
4. Preparing the Wood:
Prepare the wood by measuring and marking the dimensions according to your design. Use a saw to cut the boards into the required pieces for the chair’s frame, seat, legs, and backrest. Ensure that the edges are straight and smooth.
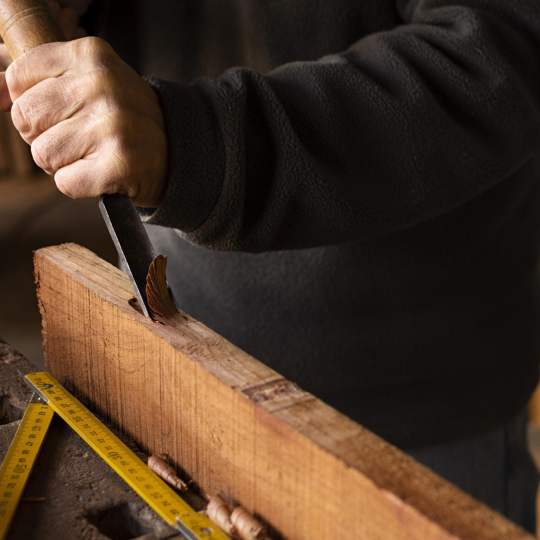
5. Cutting and Shaping the Wood:

Next, cut and shape the wood pieces according to your design. Use a saw to make precise cuts for the chair’s joints and angles. Use chisels to remove excess wood and create intricate details or curves.
6. Assembling the Chair Parts:

Now it’s time to assemble the chair parts. Apply wood glue to the joints and use clamps to hold the pieces together securely. Follow your design plan carefully to ensure accurate alignment and stability. Let the glue dry.
7. Sanding and Smoothing the Chair:
Once the glue has dried, use sandpaper to smooth the surfaces of the chair. Start with a coarser grit and gradually move to finer grits for a polished finish. Sand along the wood grain to avoid scratches. Pay attention to the edges and corners to achieve a comfortable and visually appealing shape.
8. Applying Finish to the Chair:

To protect and enhance the natural beauty of the wood, apply a finish to the chair. Choose a finish that suits your preferences, such as varnish, oil, or paint. Apply the finish evenly using a brush or cloth. Follow the manufacturer’s instructions for drying and curing times.
9. Adding Upholstery (Optional):
If desired, you can add upholstery to your wooden chair for added comfort and style. Measure and cut foam padding and fabric to fit the seat and backrest. Attach the upholstery using a staple gun or adhesive. Ensure the upholstery is taut and free of wrinkles for a professional look.
Related: How to Make Wooden Chairs Comfortable for Working?
10. Final Touches and Quality Check:
Lastly, Give your chair a final inspection and make any necessary adjustments. Check for any loose joints or rough edges. Test the chair’s stability and comfort by sitting on it. Make sure all components are securely fastened. If needed, apply an additional finish or make minor refinements.
Conclusion
Congratulations! You have successfully learned how to make a wooden chair from start to finish. Crafting your own chair allows you to showcase your woodworking skills and create a personalized piece of furniture. By following the steps outlined in this guide and employing your creativity, you can craft a chair that adds charm and character to your space. Remember to prioritize safety throughout the process and enjoy the satisfaction of sitting on a chair that you made with your own hands.
FAQs
1. Is woodworking experience necessary to make a wooden chair?
While prior woodworking experience is helpful, beginners can also learn and make a wooden chair by following detailed instructions and practicing essential woodworking techniques.
2. Can I use softwood instead of hardwood for the chair?
Hardwood is generally recommended for its durability and strength. Softwood may be suitable for certain chair components, but it may require additional reinforcement and maintenance.
3. What tools are essential for making a wooden chair?
Key tools for making a wooden chair include a saw, chisels, clamps, sandpaper, and measuring tools. Additional tools such as drills and routers may be required for specific designs.
4. How long does it take to make a wooden chair?
The time required depends on the complexity of the design, your woodworking skills, and the availability of tools. It can range from several days to a few weeks.
5. Can I customize the design of my wooden chair?
Absolutely! Feel free to customize the design according to your preferences. Experiment with different shapes, finishes, and upholstery options to create a unique chair that reflects your style.
Leave a Comment